

Dormer Repair in Charlotte, NC
Quick answer
Dormer repair means fixing the small walls, trim, siding, window and roof flashing around a dormer, usually after water has gotten in where the dormer meets the main roof. Around Charlotte the most common causes are failed step flashing on the side walls, siding or trim sitting tight on the shingles, and leaks at the dormer window. A lasting repair fixes the flashing and the rotted wood together, in one visit.
A dormer is basically a tiny house sitting on your roof. It has its own roof, its own walls, a window and a whole lot of seams. Every one of those seams is a place water can get in.
That’s why dormer repair in Charlotte, NC is rarely just one thing. The leak usually starts at the flashing. The rot shows up in the trim and siding a few years later. And most homeowners end up calling a roofer for one and a carpenter for the other, then watching them blame each other.
We do both. Same crew, same visit.
Seeing peeling trim, soft wood or a ceiling stain under a dormer? Call 704-847-7119 for a free next-day inspection.
What are the parts of a dormer that fail?
Quick anatomy, because it’ll make the rest of this page make sense:
- Dormer roof. The small roof on top. Shingled like the main roof, with its own ridge and valleys where it meets the main slope.
- Cheek walls. The two side walls, usually triangular. They sit right on the main roof, which makes them the number one leak point.
- Face. The front wall with the window in it.
- Window and trim. Head, sill and side casings around the glass, plus corner boards and the fascia along the dormer roof edge.
- Flashing. Step flashing where the cheek walls meet the main roof, an apron along the bottom of the face, and valley flashing where the dormer roof ties in.
If any of those terms are new, our parts of a roof guide has the full rundown.
Dormer types and where each one leaks
| Dormer type | What it looks like | Usual weak spot |
|---|---|---|
| Gable dormer | Small peaked roof over a window, the most common type on Charlotte area colonials | Cheek wall step flashing and the two small valleys behind it |
| Shed dormer | One wide, shallow sloped roof, often across much of the back of a house | The low pitch of its own roof, plus the long joint where it meets the main roof |
| Hip dormer | Roof slopes on three sides, like a small hip roof | Hip and valley transitions, more seams in a small space |
| Eyebrow dormer | Curved, low and wavy, no side walls | Shingles bent over curves, hard to flash, window head |
| Wall dormer | Face sits flush with the house wall below and breaks the eave line | Where the eave and gutter stop on each side, and the window sill |
The cheek walls in our photos belong to a gable style dormer, the type we repair most often around Matthews and south Charlotte.
The flashing piece that’s missing on a lot of dormers
It’s called a kickout flashing, and it’s small. A bent piece of metal at the very bottom of the cheek wall, where the wall ends and the gutter or lower roof edge begins. It kicks water away from the wall and into the gutter.
Without it, water running down the step flashing goes straight behind the gutter and into the trim and wall below. The result is a rotted corner board and fascia right at the bottom of the dormer, even when the rest of the flashing is fine. We see it missing on homes of every age. If your rot is concentrated at that lower corner, this is very likely why.
A few other flashing details we check every time:
- Step flashing woven in, one piece per course. Not one long strip, which lets water run behind it.
- Siding lapping over the flashing, so water running down the wall lands on metal, not behind it.
- Self adhering membrane turned up the wall behind the flashing, as a second line of defense.
- Apron flashing at the face lapping over the shingles below, never tucked under them.
Why dormers rot around Charlotte
Partly the weather, partly how the houses were built.
Charlotte summers are humid, and afternoon storms drive rain sideways into exactly the joints a dormer has the most of. Shaded dormers under big oaks stay damp longer after each storm, and moss and mildew hold even more water against the wood.
Then there’s the material. Many homes built in the boom decades around Charlotte used finger jointed pine trim, which looks fine painted but soaks up water fast at the joints and cut ends once the paint fails. OSB sheathing behind the siding swells when it gets wet and doesn’t recover. Put those together on a wall that sits directly on the roof, and rot is close to guaranteed if the flashing isn’t right.
Our post on wood rot treatment vs repair explains when wood can be saved and when it has to come out.
Why do dormers leak and rot?
| What’s failing | What you notice | How we fix it |
|---|---|---|
| Step flashing on the cheek walls | Stain on the ceiling or knee wall beside the dormer, often only in wind driven rain | Lift shingles and siding, install new step flashing piece by piece, reinstall |
| Siding or trim touching the shingles | Swollen, dark or peeling bottom edges on the cheek walls | Cut out rot, replace with rot resistant material, leave a gap above the roof |
| Window head or sill | Soft sill, paint failing under the window, water on the inside sill | Replace sill and trim, add head flashing, reseal or replace the window |
| Apron flashing at the face | Rot along the bottom of the dormer front, stain below it inside | New apron flashing lapped over the shingles below |
| Valleys where the dormer roof meets the main roof | Leak near the top corners of the dormer | Rebuild the valley with ice and water shield and new metal or shingle valley |
| Caulk doing flashing’s job | Leak that stops after someone caulks it, then comes back next year | Remove the caulk patch, install real flashing |
Notice how many of those fixes involve both roofing and carpentry. That’s the whole problem with dormers. You can’t reflash a cheek wall without pulling siding off it. You can’t replace rotted trim properly without dealing with the flashing that let the water in.
Had a dormer patched before and it’s back? Call 704-847-7119. We’ll find the actual source.
Signs your dormer needs attention
Walk outside and look up. Binoculars help. You’re looking for:
- Paint peeling on the trim or siding, especially at the bottom edge of the cheek walls
- Dark, swollen or split wood where the siding meets the roof
- Gaps or missing caulk around the window trim
- Shingles lifted or missing near the dormer’s sides
- Gutters overflowing onto the dormer below a higher roof
Then check inside. A stain on the ceiling near a dormer, a damp smell in the closet beside it, or water on an interior window sill all point the same direction. One thing to know: the stain is often not right under the leak. Water runs along the framing first.
Is it a leak, or condensation?
Worth asking before you pay for anything. Dormer rooms often sit right against the attic. In a Charlotte winter, warm moist air from the house can hit a cold surface in there and drip. If the wet spot shows up on cold, dry days rather than during rain, you may be looking at a ventilation or insulation issue, not a flashing failure. We check for both. See attic ventilation and insulation if that sounds familiar.
How we repair a dormer, step by step
- Trace the water. Inspect from the attic or the knee wall space and from the roof. If the source isn’t obvious, a controlled water test on one section at a time tells us where it enters.
- Protect the house. Tarps on the roof and landscaping, interior protection if we need to work from inside.
- Open it up. Remove the siding courses and trim on the affected walls, and lift the shingles along the cheek walls so the flashing is exposed.
- Cut out the rot. Every piece of soft sheathing, trim or framing comes out, back to solid wood. Probe it, don’t guess.
- Rebuild the structure. New sheathing and, where needed, new framing members sistered in.
- Waterproof properly. Self adhering membrane turned up the wall, new step flashing woven into each shingle course, apron and head flashing where they belong.
- Reinstall siding and trim. Rot resistant material, with the bottom edge held off the shingles so it can’t wick water.
- Prime, paint and inspect. All cut ends sealed, final paint, and a walkthrough with you.
How we find the source: the water test
When a dormer leak isn’t obvious, guessing is expensive. So we test.
One person runs a garden hose on a single small area of the roof, starting low and working up. Someone else watches from the attic or the knee wall space with a light. We give each area several minutes before moving to the next. Low first, because water from higher up runs down over everything below it and confuses the result.
It’s slow and it’s not glamorous. It’s also the most reliable way to tell a cheek wall leak from a window leak from a valley leak. Once we know which, the repair is targeted instead of everything at once.
Matching the siding and trim that’s already there
Most dormer repairs replace part of a wall, not the whole thing. The new pieces have to blend in.
- Vinyl siding. Profiles and colors change over the years. Sometimes we can match exactly. Sometimes the best answer is to borrow matching pieces from a less visible part of the house and put new on the back.
- Wood lap siding. Matched by width and profile, primed on every side before it goes up, then painted.
- Shake style siding. Like the photos on this page. Course height and stagger have to line up with what’s there, or the patch shows from the street.
- Fiber cement. Available in lap and shake profiles, painted to match.
If the existing siding is failing across the whole house, it might be time to look at siding repair on a bigger scale rather than one dormer at a time.
Inside the dormer: knee walls, insulation and air
The rooms behind dormers are often the hottest in summer and the coldest in winter. That’s because the walls on either side, called knee walls, back right onto the attic. If they’re poorly insulated or leaky, warm moist air from the room gets into the cold attic space in winter and condenses on the underside of the roof deck. That moisture can look exactly like a leak.
So when we inspect a dormer from inside, we also look at knee wall insulation, gaps around the attic access, and whether the attic is venting properly. Sometimes the best dormer repair includes a little insulation work.
HOAs and appearance
Dormers sit on the front of a lot of houses, so the repair shows. If you’re in an HOA, changing siding material, trim profile or color may need architectural approval, even on a small repair. Like for like replacement usually doesn’t, but check your covenants before work starts. We’re happy to provide material details for your application.
What you can do yourself, and what you shouldn’t
Safe to do:
- Look at your dormers from the ground with binoculars twice a year
- Keep the gutters below dormers clear, so water doesn’t back up into the trim
- Check the ceiling and walls inside dormer rooms after big storms
- Touch up peeling paint on trim you can reach safely from inside through the window
Leave to a pro:
- Anything that means walking on the roof. Dormers sit on steep slopes, and it’s where a lot of DIY falls happen.
- Caulking flashing joints. It usually makes the leak harder to find later.
- Pulling siding off cheek walls. It’s easy to damage the flashing and the shingles underneath.
What the finished work looks like
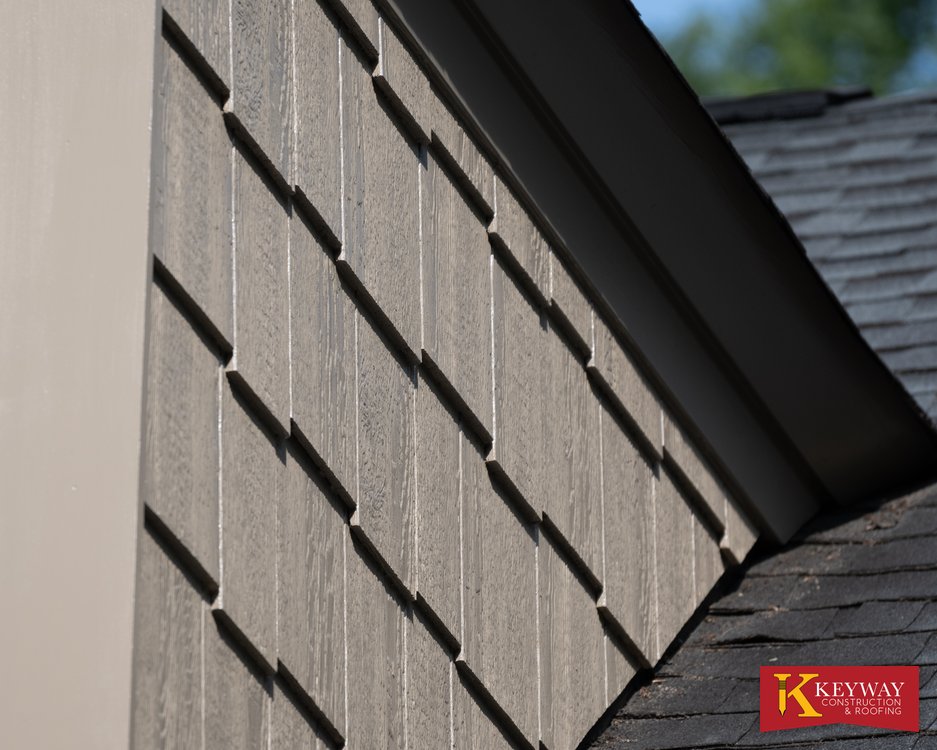
This is a Keyway dormer job up close. Shake style siding courses on the cheek wall, a clean corner board, and fresh trim running down to the roof. Look at the bottom: the siding stops above the shingles instead of sitting in them. That small gap is the difference between trim that lasts and trim that rots out again.
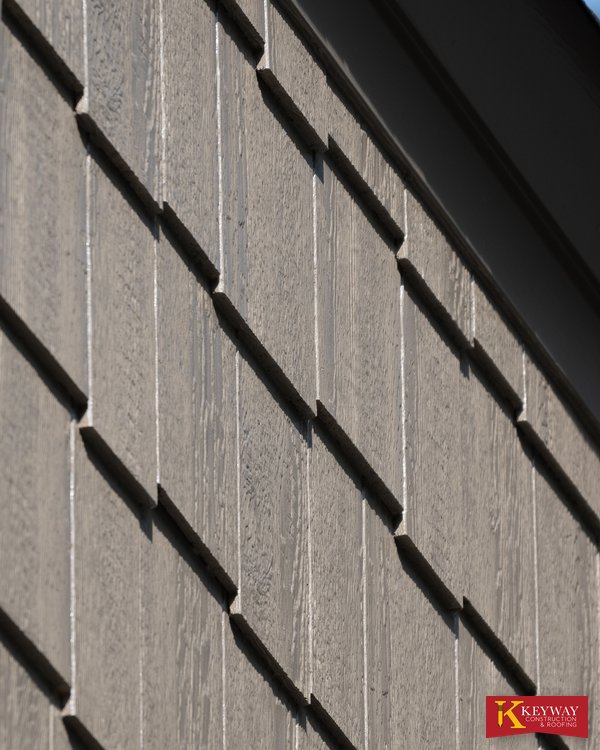
The pattern of the shakes is staggered on purpose. It matches the original look of the house and sheds water course over course, each one lapping the one below.
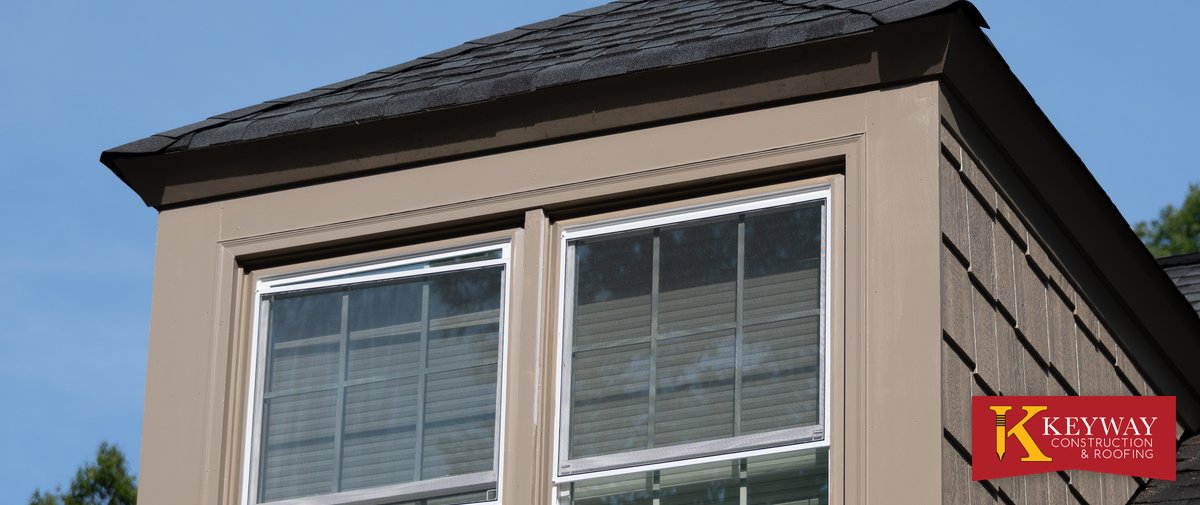
The photo at the top of the page shows the same kind of dormer from the front. New windows, new trim around them and siding to match. One crew, one visit.
Three patterns we see over and over
The rotted bottom corner. Paint peeling and wood soft at the lowest point of the cheek wall, right above the gutter. The rest of the dormer looks fine. This is almost always the missing kickout flashing described above, and sometimes a gutter that overflows onto the corner. The fix: cut out the rotted corner board and sheathing, add a kickout, rebuild with rot resistant trim.
The closet stain. A brown ring on the ceiling of a closet or the sloped ceiling beside the dormer, showing up mostly after storms with wind. Usually the step flashing on that side has failed or was never woven in properly. The fix means opening the cheek wall, reflashing course by course and reinstalling the siding.
The soft sill. The window sill on the dormer face feels spongy, and paint is failing under the window. Water’s getting in at the head of the window or through the sill joints and running down. The fix might be a new sill and trim, new head flashing, or in some cases a replacement window.
Recognize one of those? Then you already know most of what we’ll say when we come out.
Questions to ask any contractor about dormer repair
- Will you find the source before you quote the repair, and how?
- Does your price include removing and reinstalling siding to reach the flashing?
- Will you replace the step flashing piece by piece, or just seal it?
- Is a kickout flashing included at the bottom of each cheek wall?
- What material will replace the rotted trim, and how will it be kept off the roof?
- Who handles the roofing part and who handles the carpentry part?
- What’s your workmanship warranty, in writing?
A good contractor answers all seven without hesitating. If the plan is mostly caulk and paint, it’ll look great for about a year.
Who does the work
Keyway Construction and Roofing is a family owned company that’s been working on Charlotte area homes since 1975, based on Stallings Road in Matthews. We’re Owens Corning certified, accredited with the Better Business Bureau and listed on Angi. That combination matters on a dormer, because the job is half roofing and half carpentry, and our crews do both. Every repair comes with our 1-year workmanship warranty. The photos on this page are from our own jobs. Read our customer reviews or learn more about Keyway.
Which material should go back on the dormer?
- Wood. Matches older homes perfectly and paints well. It’ll rot again if water gets to it, so detailing and paint upkeep matter.
- PVC trim. Won’t rot at all. Great for the parts closest to the roof and the sill. Needs the right fasteners and allowance for expansion in summer heat.
- Fiber cement. Siding and shake panels that resist rot, insects and fire. A common choice for cheek walls. Our fiber cement siding page has more.
Often the best answer is a mix: rot proof trim at the bottom edges and sill, and siding that matches the rest of the house. We’ll walk you through the options and tell you what we’d put on our own house.
What repair day looks like
Most homeowners have never had a dormer opened up, so here’s what to expect.
The crew sets up ladders or roof brackets and lays tarps over shrubs and the roof below the dormer. Then the siding and trim come off the affected walls. That part’s quick, and a little loud. Once the wood underneath is exposed, we’ll often call you out to see it. Rot looks different in person than in a photo, and it helps to see why the repair goes as far as it does.
The rebuild takes longer than the tear out: new sheathing, membrane, flashing, then siding and trim going back up piece by piece. If the work can’t finish in one day, the wall is closed up and weathertight before the crew leaves. At the end you get a walkthrough, a cleaned up yard and the paint touched up or scheduled.
You don’t need to move out or clear the room inside, unless we need to check the knee wall or attic from that side. If so, we’ll ask ahead of time.
Fixing more than the dormer while we’re up there
Since the ladders and roof setup are already in place, it’s often worth handling nearby problems in the same visit:
- Fascia and soffit below the dormer, which often rots from the same water
- Gutters that overflow onto the dormer corner
- Pipe boots and vents on the same slope
- Paint on other trim that’s starting to fail before it turns into rot
We’ll point out anything we notice, and you decide what’s worth doing now and what can wait.
Repair the dormer, or replace the roof?
A leaking dormer doesn’t automatically mean a new roof. If the main roof has years left, we repair the dormer and flashing and you’re done. If the roof is near the end of its life, though, it’s smarter to fix the dormer as part of a roof replacement, because all the flashing gets replaced anyway. We’ll tell you which makes sense for your house. Honestly.
If it’s just a leak somewhere else on the roof, see our roof repair page. If the rot has spread to other trim, our exterior trim repair, fascia and soffit repair and window sill repair pages cover those.
What affects the cost of dormer repair?
Every dormer is different, so here’s what moves the number instead of a price that wouldn’t fit your house:
- How far the rot has spread, and whether framing is involved or just trim and sheathing
- How many walls need siding removed to reach the flashing
- Whether the window needs resealing or replacing
- Roof pitch and height, which decide how much safety setup the crew needs
- The materials you choose to put back
- Whether shingles around the dormer can be reused or need replacing
Our estimates are free, next day, and itemized so you can see each part.
Family owned and roofing Charlotte since 1975, with a 1-year workmanship warranty on every repair. Call 704-847-7119 or request a free estimate.
Dormer repair questions
Why is my dormer leaking only during wind driven rain?
Wind pushes water sideways into the joints where the dormer’s side walls meet the roof. If the step flashing there is damaged, missing or replaced by caulk, those storms find the gap while ordinary rain runs past it.
Can caulk permanently fix a leaking dormer?
No. Caulk cracks as the house moves with heat and cold, usually within a season or two. Lasting repairs replace or correct the flashing, which is what’s supposed to keep the water out.
Does the siding have to come off to repair dormer flashing?
Usually, yes. Step flashing sits behind the siding on the cheek walls, so the bottom courses of siding and trim have to come off to replace it properly.
Who should repair a dormer leak, a roofer or a carpenter?
Ideally one crew that does both. Dormer repairs almost always involve flashing and rotted wood together. Keyway handles the roofing and the carpentry in the same visit.
Could the dormer window be causing the leak?
It can. A failed head flashing, rotted sill or worn seal around the window lets water into the wall below it. We check the window as part of every dormer inspection.
Does a leaking dormer mean I need a new roof?
Not necessarily. If the main roof has years left, repairing the dormer and its flashing solves it. If the roof is near the end of its life, fixing the dormer during a replacement is the better value.
What is the best material for dormer trim and siding?
Rot resistant materials such as PVC trim and fiber cement siding hold up best near the roof. Wood still works on older homes if it’s primed on every side, painted and kept off the shingles.
How long does dormer repair take?
Many single dormer repairs take a day or two. More extensive rot, framing repairs or window replacement can add time. We give you an expected timeline with the estimate.
Why is the ceiling stain not directly under my dormer?
Water often travels along rafters or sheathing before it drips, so the stain can show up several feet from where water is actually getting in.
What is kickout flashing on a dormer?
A small bent piece of metal at the bottom of the dormer’s side wall, where the wall meets the gutter or the lower roof edge. It directs water into the gutter instead of behind it. When it’s missing, the trim and wall at that corner usually rot.
Are shed dormers more likely to leak?
They can be. A shed dormer’s own roof is often low pitched, and it meets the main roof along one long joint. Both need the right materials and flashing, and a low pitch may call for a membrane instead of shingles.
Dormer repair is part of our wood rot repair services. See dormers on real jobs in our Matthews roof replacement and Charlotte mansard roof projects.
Protect Your Gutters With Gutter Caps
Eliminate tedious maintenance tasks and unsightly clogs with time-saving gutter guards.Proudly Serving
Greater Charlotte
Matthews | Stallings | Mint Hill | Indian Trail | Weddington
Waxhaw | Monroe | Ballantyne | South Park | Arboretum |
Myers Park | Pineville
Matthews | Stallings | Mint Hill | Indian Trail | Weddington
Waxhaw | Monroe | Ballantyne | South Park | Arboretum |
Myers Park | Pineville